
If you need to give a colleague, SEO agency or SEO consultant access to your Google Search Console property, you can do so in just a few minutes. This guide explains how to add a new user, choose the correct permission level and manage existing users safely.
When you log in to Google Search Console, make sure you’re doing so with the login that has ownership of the property.
If you can access more than one property in Google Search Console, make sure that you’re working in the right one before proceeding with the next steps.
Simply select the property from the drop-down menu at the top left of the screen:
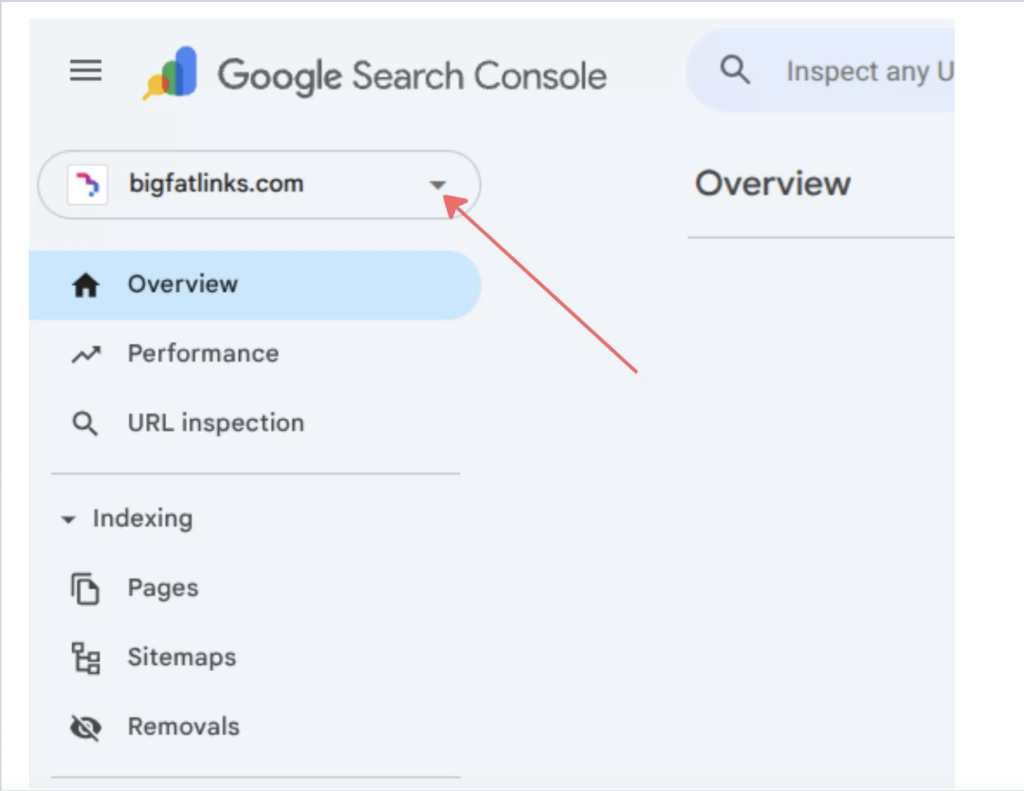
If you can access more than one property in Google Search Console, make sure that you’re working in the right one before proceeding with the next steps.
Simply select the property from the drop-down menu at the top left of the screen:
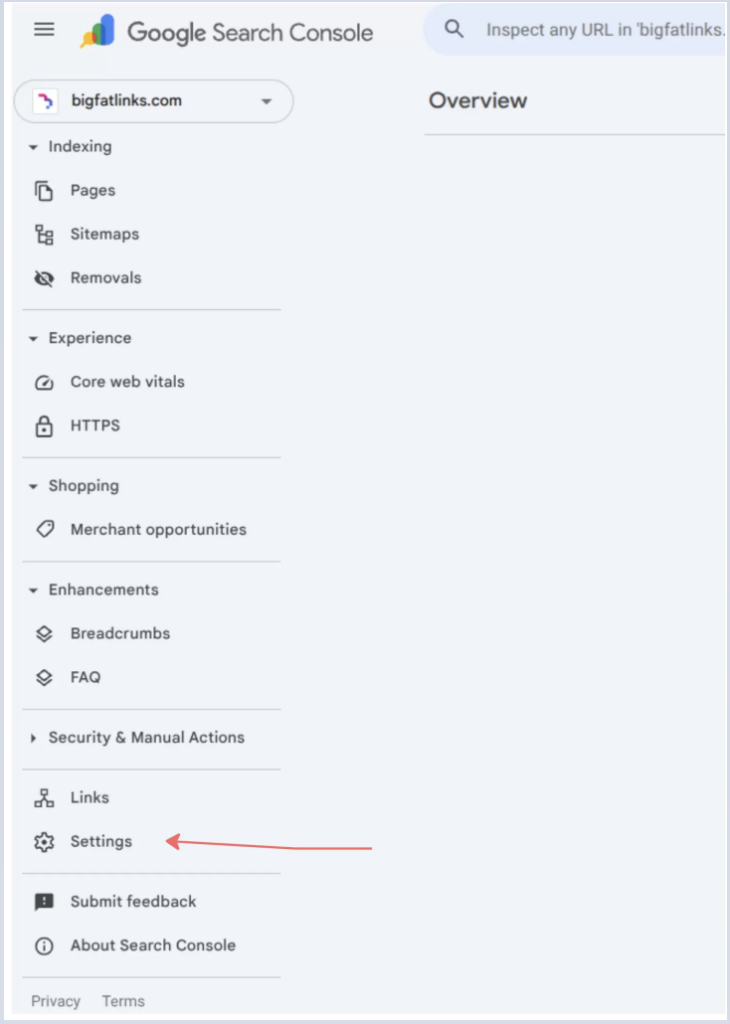
Once the settings page has loaded, select Users and Permissions:
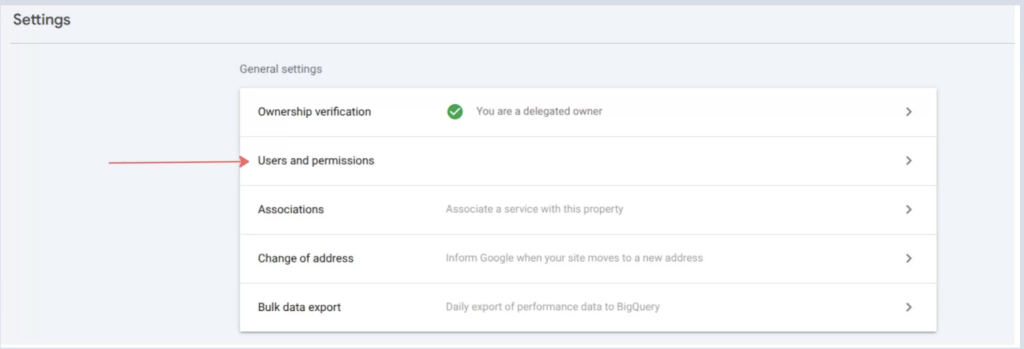
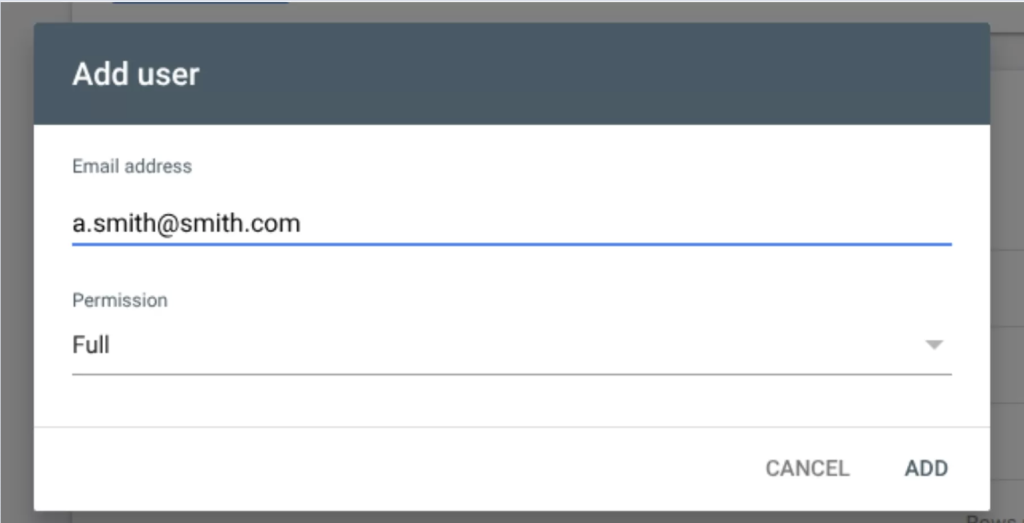
Once you’re on the Users and Permissions page, click the blue Add User button in the top right corner. A pop-up window will appear where you can enter the user’s email address and choose their permission level.
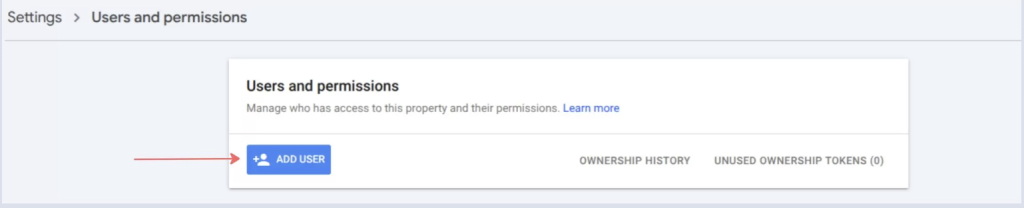
Enter the email address for the person who needs access, and then select their permission level.
Please note: If you are working with Big Fat Digital, check with your account manager for the correct email address and select Full permissions.
You may need to grant access if:
This helps satisfy broader search intent.
Google Search Console has three levels of permission to choose from:
Yes, you can. Simply follow the steps above to navigate to the users on your property. From there, use the menu in the permissions section to choose a new status.
Yes. You can add multiple users to the same Google Search Console property and assign each person the appropriate permission level. This is useful when several team members, agencies or developers need access.
The email address must be linked to a Google Account, but it does not necessarily need to end in Gmail.com. A business email address can be used if it has been registered as a Google Account.
A Full user can view all Search Console data and perform most actions, including submitting URLs for indexing and validating fixes.
A Restricted user can view most reports but has limited access to actions and certain account settings.
In most cases, an SEO agency will require Full access so they can investigate technical issues, submit indexing requests, review performance data and validate fixes. Only provide access to trusted individuals or businesses.
Usually, no. Full access is generally sufficient for an SEO agency or consultant. Owner access provides greater control over the property and should only be granted when absolutely necessary.
You may not have permission to add new users. Only property owners can add or remove users and manage access levels. Check that you are logged in with the Google Account that owns the Search Console property.
Check that you entered the correct email address and that the email is connected to a Google Account. The user should also make sure they are logged in with the same account that was granted access.
Yes. Property owners can change an existing user from Restricted to Full access, or from Full to Restricted access, through the Users and permissions section.
Yes. Go to Settings, select Users and permissions, find the relevant user and choose the option to remove their access. It is good practice to remove users who no longer work with your business.
No. Simply giving someone access to Google Search Console will not affect your website or search rankings. However, Full users can perform certain actions, so access should only be given to trusted people.
No. Google Search Console and Google Analytics are separate platforms with separate permissions. If an agency or consultant needs access to both, you will need to add them individually to each platform.
Access is usually available immediately after the user has been added. If they cannot see the property, ask them to refresh the page and confirm they are logged in with the correct Google Account.
"*" indicates required fields
"*" indicates required fields