
How to add a user to Google Search Console

Below are the simple steps you need to follow to add a user to your existing Google Search Console property. Whether you are sharing access with a marketing consultant or another team member, the steps below will ensure you can share access quickly and easily.

Blog Links

Sharing your Google Search Console property: a step-by-step guide

Step 1: Log in to your Google Search Console account

When you are logging in to Google Search Console, make sure you’re doing so with the login that has ownership of the property.

Step 2: Select the GSC property you wish to access

If you can access more than one property in Google Search Console, make sure that you’re working in the right one before proceeding with the next steps.

Simply select the property from the drop-down menu at the top left of the screen:
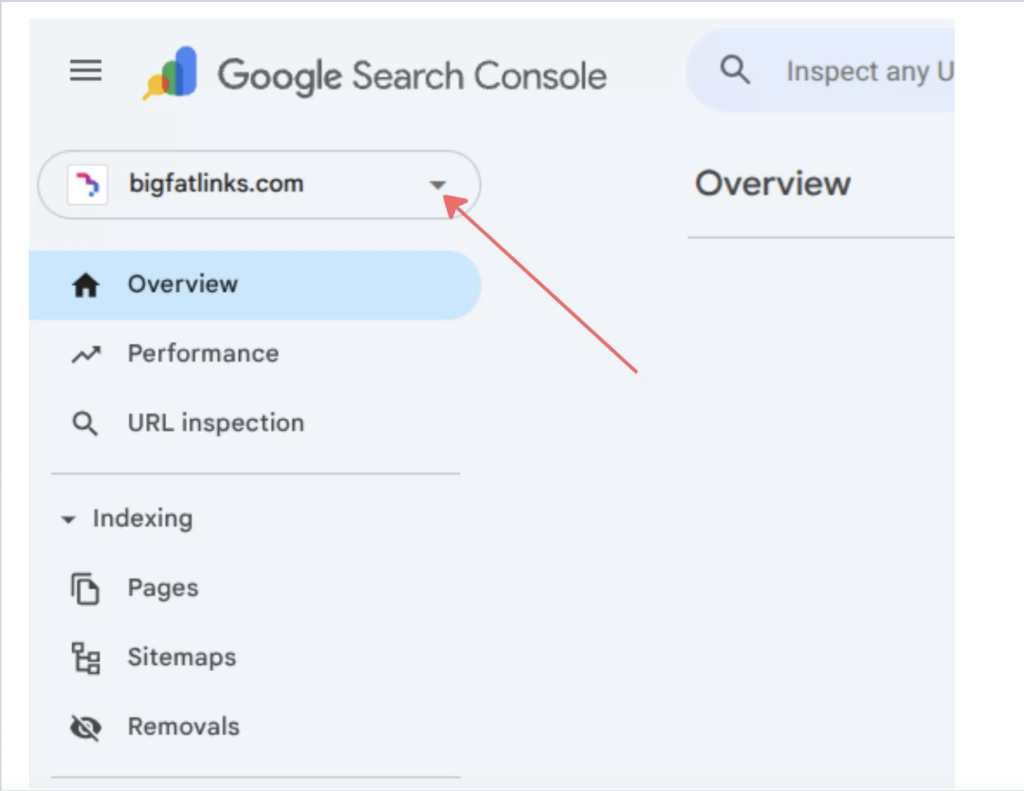
Screenshot of the Google Search Console dashboard showing the selected website property (bigfatlinks.com) in the property selector dropdown. A red arrow highlights the dropdown menu used to switch between Search Console properties.

Step 3: Go into property settings

If you can access more than one property in Google Search Console, make sure that you’re working in the right one before proceeding with the next steps.

Simply select the property from the drop-down menu at the top left of the screen:
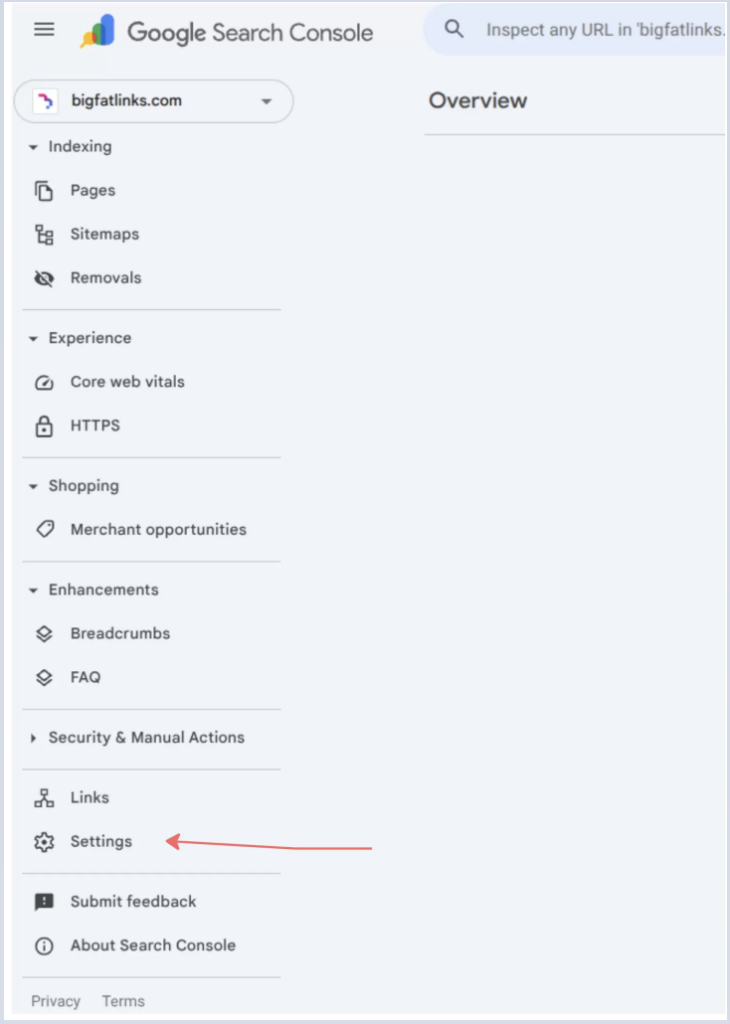
Screenshot of the Google Search Console dashboard navigation menu with the Settings option highlighted by a red arrow. The sidebar displays indexing, Core Web Vitals, HTTPS, enhancements, links, and settings, demonstrating where to access Search Console property settings.

Step 4: Click on Users and Permissions

Once the settings page has loaded, select Users and Permissions:
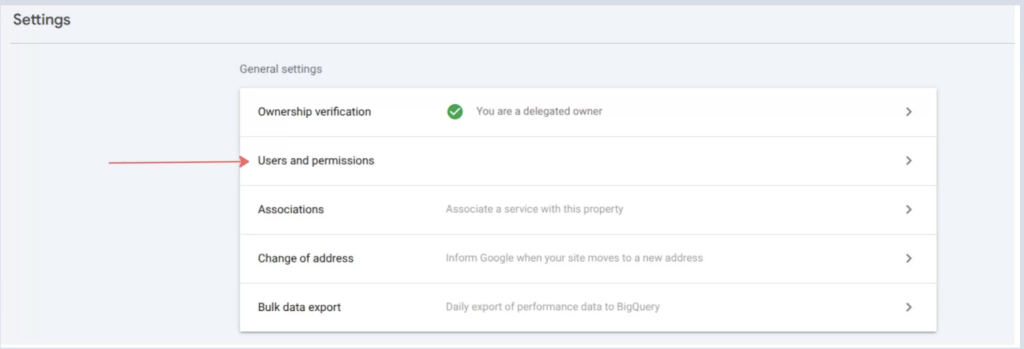
Screenshot of the Google Search Console Settings page with the Users and permissions option highlighted by a red arrow. The page also displays ownership verification, associations, change of address, and bulk data export settings, showing where to manage user access and permissions for a Search Console property.

Step 5: Click Add User

Click the blue Add User button located at the top of the screen:
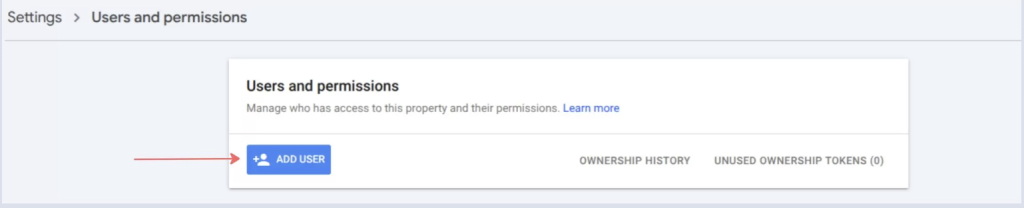
Screenshot of the Google Search Console Users and permissions page with the blue Add User button highlighted by a red arrow. The page shows where website owners can grant access to additional users and manage Search Console permissions.

Step 6: Input user details

Enter the email address for the person who needs access, and then select their permission level.

Please note: If you are working with Big Fat Digital, check with your account manager for the correct email address and select Full permissions.
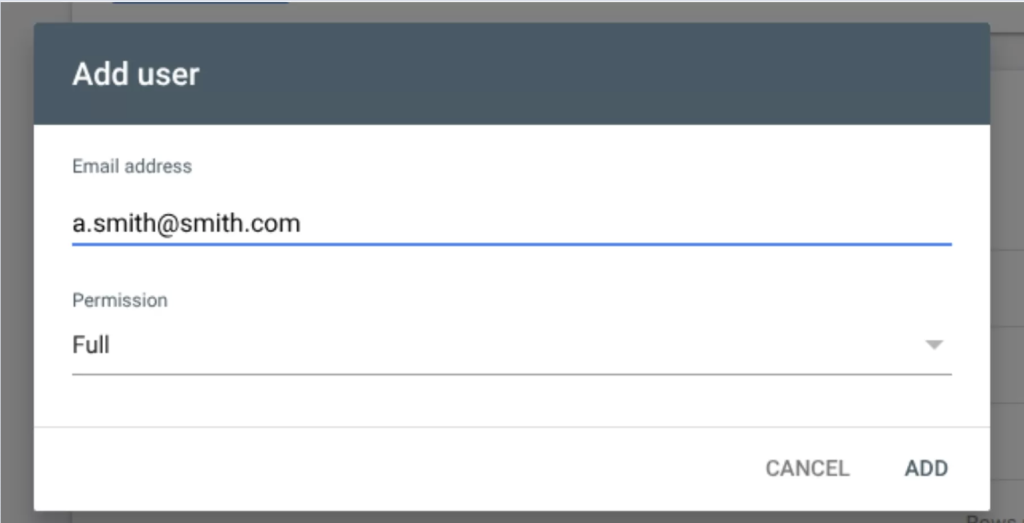
Screenshot of the Google Search Console Add user dialog showing fields to enter an email address and assign a permission level. The permission is set to Full, with Cancel and Add buttons displayed, illustrating how to grant full access to another user in Google Search Console.

What level of permission should I give a user?

Google Search Console has three levels of permission to choose from:

  • Restricted: This view gives the user access to most data, but they can perform limited actions.
  • Full: Users can view all data and perform most actions, including submitting indexing requests and verifying fixes.
  • Owner: This gives the user full access to the property. If you are the verified owner, then the new owner will be classed as a delegate owner.

Can I change a user’s permission level?

Yes, you can. Simply follow the steps above to navigate to the users on your property. From there, use the menu in the permissions section to choose a new status.

"*" indicates required fields

This field is for validation purposes and should be left unchanged.
This field is hidden when viewing the form

"*" indicates required fields

This field is for validation purposes and should be left unchanged.
Drop files here or
Max. file size: 8 GB, Max. files: 5.